You guys, I can't believe I waited as long as I did to create an email list. Creating a newsletter for my blog has totally changed the blogging landscape for me. It's my best blogging asset.
Why do you need to create an email list? What's the point anyway? When you create a newsletter, you own it. Having a newsletter provides a way to communicate DIRECTLY with your audience, and on a more personal level. The saying goes, “the money's in the list.” And it's true.
And you don't need a HUGE list to do it.
When I launched my first course, Instagram for Success, I had less that 2,000 email subscribers. Yep. So don't be scared. Just start. As I said in the first part of the series, just start. Even if you're at 0. Also, Convertkit is free for up to 2,000 subscribers with THIS plan!
For the #GrowYourBlog Series, we covered:
1. How to Create Foundational Content For Your Blog
2. Using Social Media to Successfully Grow Your Blog
Part 4 is here: How to Make Money as a Blogger
We, of course, need great content. Then we need social media to promote it and gain traction. Next, we need a newsletter to establish our base.
The best way to monetize your blog and keep readers coming back in the future is to create an email list. It's the best way to communicate with people, establish credibility, and inform them of what's happening first. Those that sign up for my newsletter get exclusive content and freebies that aren't shared on the blog.
For the sake of this post, I am not referring to an “RSS Email Subscription.” That is when someone signs up to receive an email every time you post, with the actual post in it. I am talking about an actual Newsletter subscription. This is an email that you create that is sent out to people signed up for your list. They are totally separate.
In this post I'm going over:
– Why you should create an email list
– Your Newsletter Options
– How to Create a Newsletter From scratch
When you create an email list, it's as if you're handpicking who you'd like to reach. You get to be specific about how someone opts in, unlike social media. And, bottom line, it's proven that newsletters help you gain more traffic and are more likely to take action on your offer. Meaning, they sign up for your stuff, buy your products, and so on.
Let's talk about options. There are a LOT of options when it comes to your newsletter. But as a blogger I'm going to only recommend two.
Mailchimp
Mailchimp is awesome and very user friendly. It's beautifully designed and offers some drag and drop options which make it even easier to use. There are a lot of features that make Mailchimp super easy to use. You can create “Campaigns” or one off emails you send to your subscribers. Or, you can create “Automations” which means you send an email when an action happens.
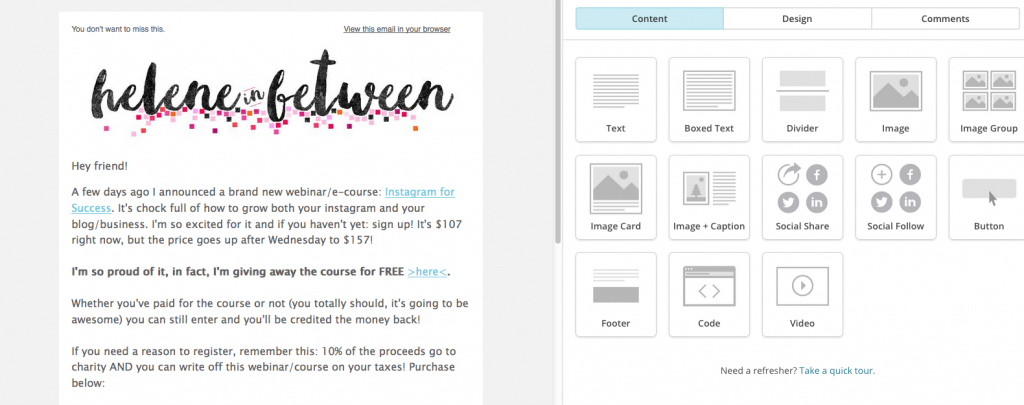
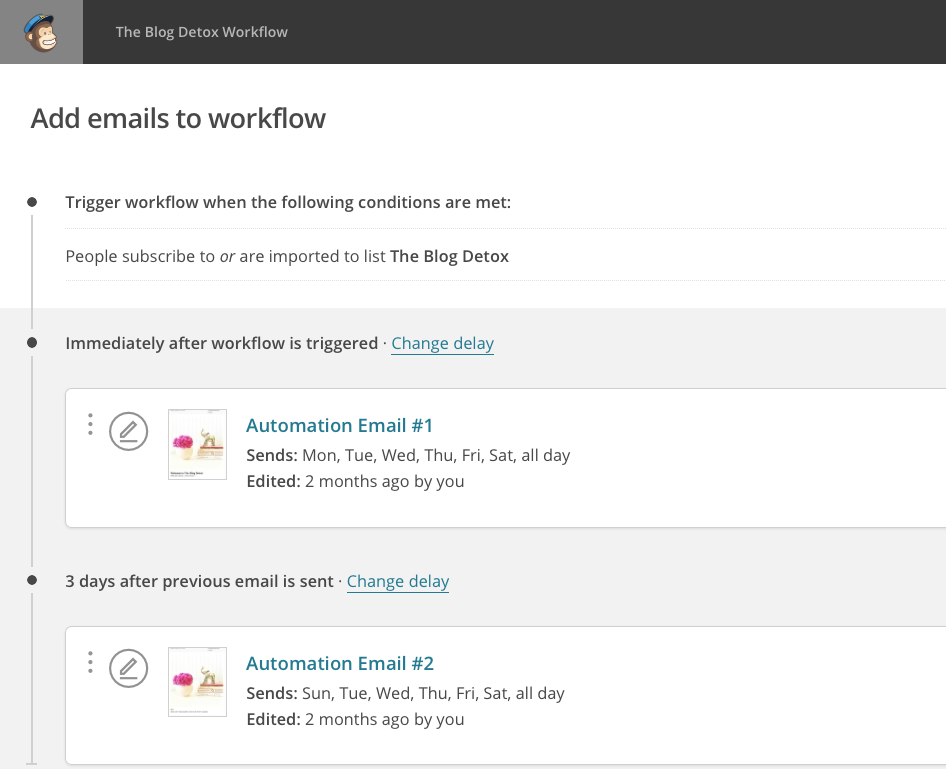
For example, I use Automations when someone new signs up for my newsletter. Automation works by immediately sending the new subscriber a welcome email from me. I can even add emails, aka a “workflow” so that once someone signs up they get an email immediately then one 2 days later then one a week later. Or whenever I want.
There are also reporting tools that help you to visualize what worked and what didn't with your newsletter. You can also gauge who clicked and who didn't and lots of other reports that will help you to improve your email performance.
ConvertKit (Free Plan for up to 2,000 Subscribers!)
Next up is ConvertKit. This is the email service I currently use. I am, to be frank, obsessed. It's clean and easy and it's designed specifically for bloggers by bloggers. It has all the features of MailChimp. Instead of Automations you have “sequences.” Instead of lists of subscribers they are put into “tags” or “forms.”
**CONVERTKIT NOW OFFERS A FREE PLAN! This is huge! And means you should definitely use it!
 With ConvertKit I can really strategize with my mailing list. I can target and send emails based on an array of factors. This is so important because I'm sending emails to people based on their behavior and based on what I think will work for them.
For example, let's say you sign up for my newsletter because you wanted to download my “Instagram Guide” you will get an email with that information. Now, let's say you're interested in my “Instagram For Success” eCourse. You will get a DIFFERENT email on that. For me, this has totally changed the game. It just makes it so incredibly easy to use ConvertKit to send emails.
While ConvertKit isn't free, there is one HUGE bonus that ConvertKit offers: free landing pages. When you create a new subscriber form (what you embed on the site to collect the email address) you can also create a landing page to collect email addresses. Why is this important? Because you don't have to pay for expensive pages like this (Leadpages) instead, you can collect email addresses in beautifully designed ConvertKit landing pages!
Here's an example of how Marianne of Design Your Own Lovely Blog uses ConvertKit's landing pages. First, she creates a free opt in, inside her blog post:
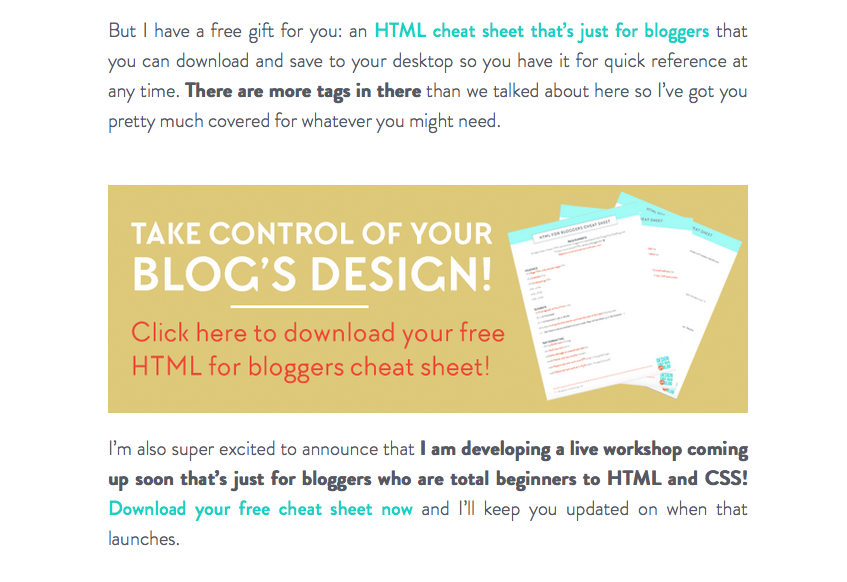
Then when the reader clicks, they are taken here, to a ConvertKit landing page:

I created my free email course “Build a Successful Blog” all inside ConvertKit with “Sequences“. Here's what it looks like inside:
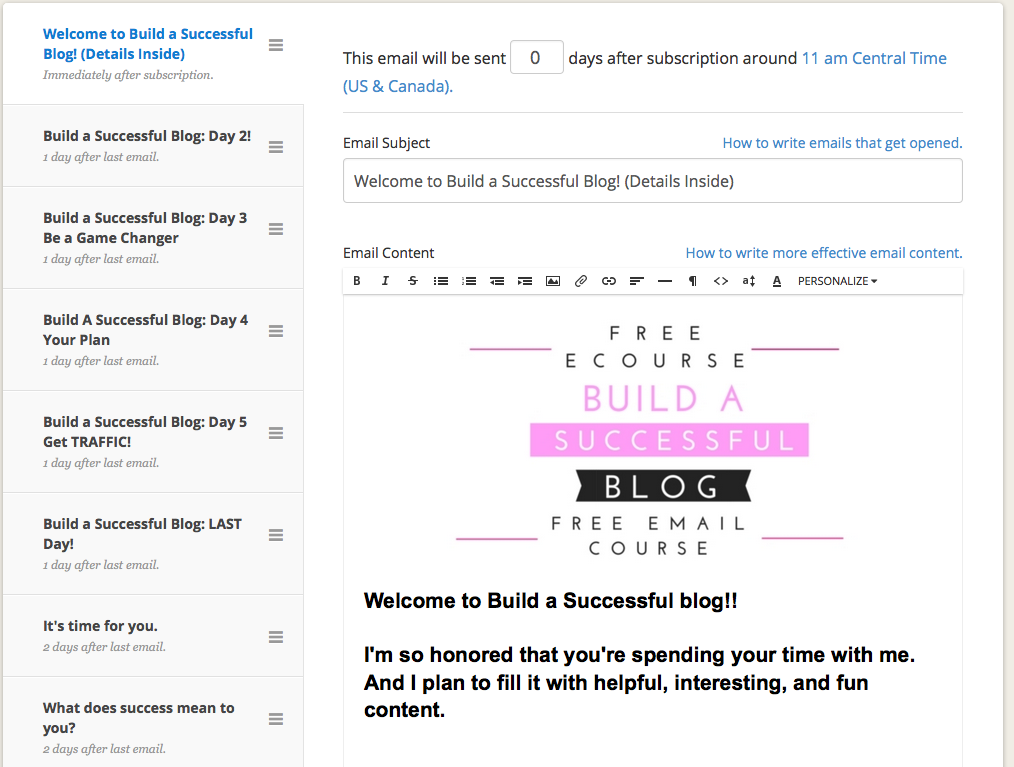
This is simple and very straightforward way for me to send out emails in a streamlined way. I can drag and drop the order of the emails, make changes as I see fit (with Mailchimp you have to PAUSE the entire workflow- AHH).
Also, ConvertKit offers Automation rules. Which means when a user clicks a link, buys a product, or does any of the “triggers” below, you can set up an “action” to do something next.
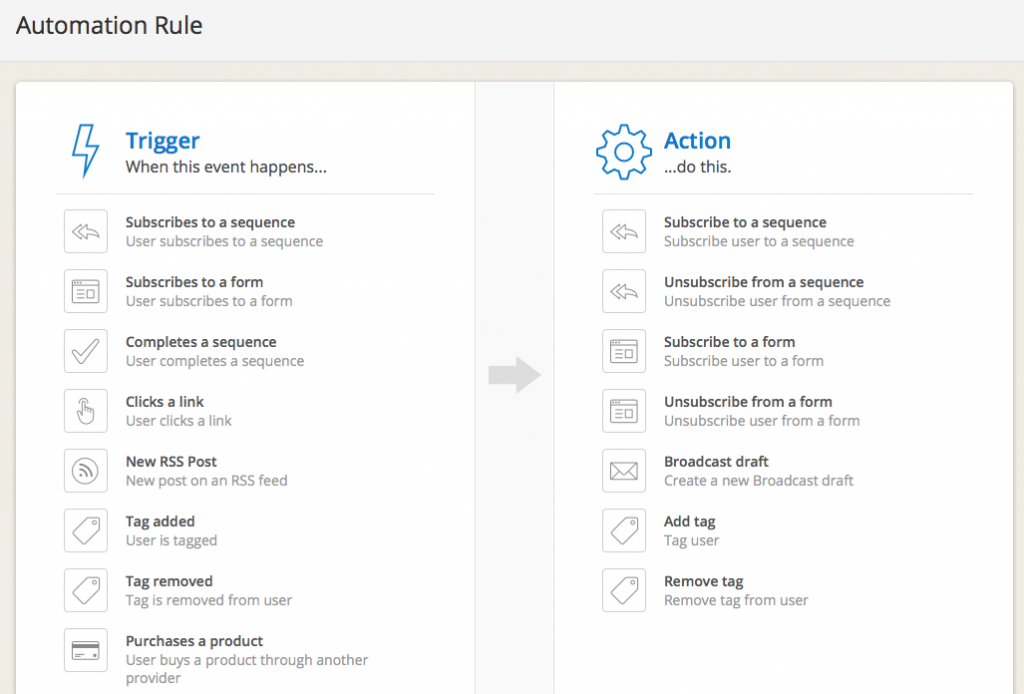
This kind of intuitive performance makes ConvertKit one of the most powerful options out there.
ConvertKit offers free tutorials on how to use their platform along with exceptional support. Yes, you will speak and interact with a real person. Which to me, is everything. And, just like Mailchimp you can create Sequences, to be sent out when someone signs up. I have a 10 email sequence in place that works so well on my blog! Or, you can simply send out a “Broadcast” an email that you send to your list or parts of your list whenever you choose.
Here are the pros and cons of each:
Mailchimp Pros:
– Free! (For up to 2,000 subscribers)
– Very easy drag and drop newsletter design
– Integrate with other platforms (such as Rafflecopter, for giveaways, and more)
Mailchimp Cons:
– Not as intuitive
– Clunkier when creating automations and workflows
– Reporting not as streamlined
– You're paying for each subscriber on each list. Meaning, if I sign up for your resources collection AND I sign up for your free guide, I'm counted twice. This can really hurt you once you get into the paid side of Mailchimp.
– Unable to edit Automations without pausing the entire sequence (can be very messy!)
ConvertKit Pros:
– Create opt-in forms, landing pages, and more ALL from one platform
– No duplicate subscribers! Meaning, if I am subscribed to multiple forms or tags in your newsletter subscription, I'm only counted once.
– Excetional reporting
– The ability to manipulate your list and send the right email to the right subscriber based on whatever factors I want.
– It's just the best, okay?
ConvertKit Cons:
– Not free, for up to 1,000 subscribers, you'll pay $29 per month.
– Can be a bit more difficult to get used to than Mailchimp's drag and drop
– No “pretty” themes
Now that you know the options, let's get down to business.
In order to create a newsletter, you only need a few things:
1. A blog (or webpage)
2. A newsletter system (I suggest ConvertKit or MailChimp)
3. A way for people to subscribe
4. An email confirming subscription
I HIGHLY suggest that you focus on #3. Instead of just coming up for a way to subscribe give them a REASON to subscribe. Create a free opt-in to encourage them to subscribe. For example, I showed you my free Instagram guide above. I also have a free resources collection at the top of my blog.
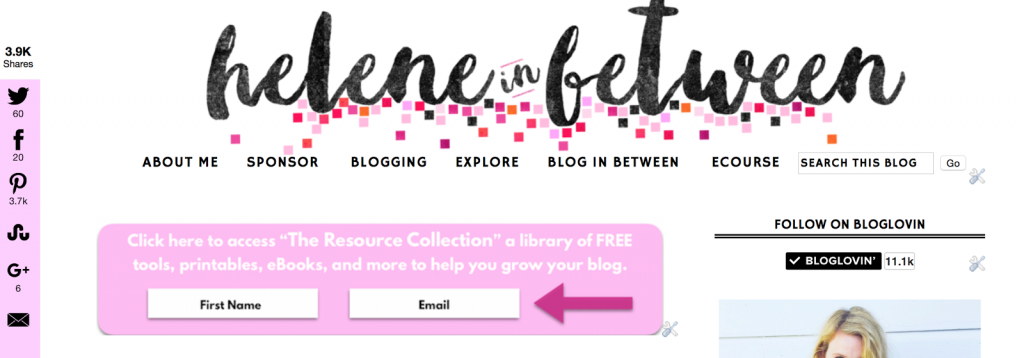
When people see this, they want to subscribe to gain access to my resources page. Once they enter in their information, they get an email sending them information on the resources page and their login info.
Or, you can have an opt-in like I showed above, with my Instagram Guide. Another example, Alisha, from The Alisha Nicole has an opt-in from her recent post. She gives you a free content kit to help you with your blog.
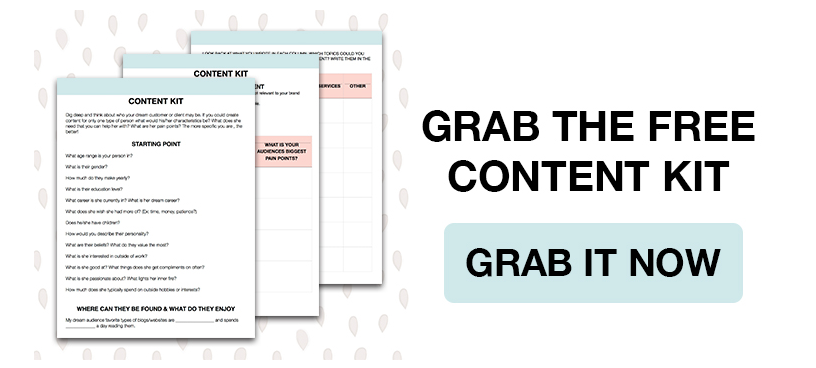
When you click “grab it now” you get the free stuff in exchange for being on her mailing list.
Want some ideas for writing your newsletter? Here are 10!
Let's take a look at the process of setting up a newsletter:
Sign Up:
Because I truly believe in ConvertKit, I'm going to show you how to do just that. First up, sign up for a ConvertKit account. (Still not convinced or money is tight? Sign up for a Mailchimp account. Here's a GREAT tutorial on using Mailchimp)
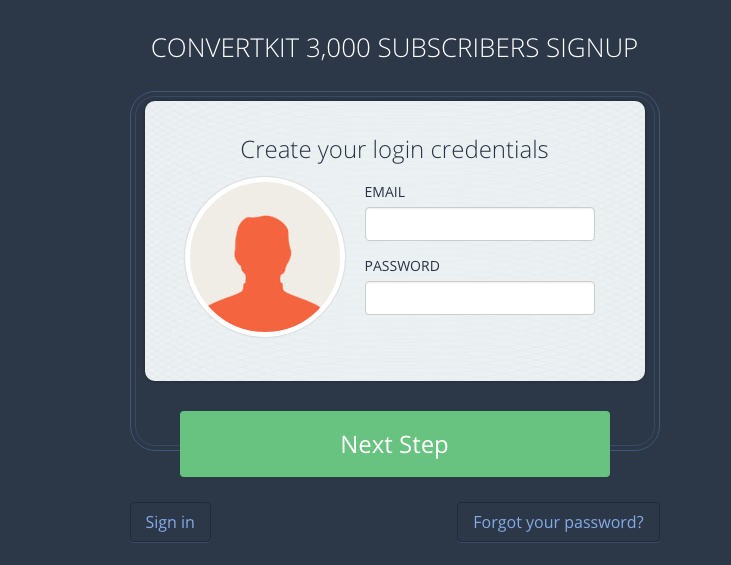
Create a Form:
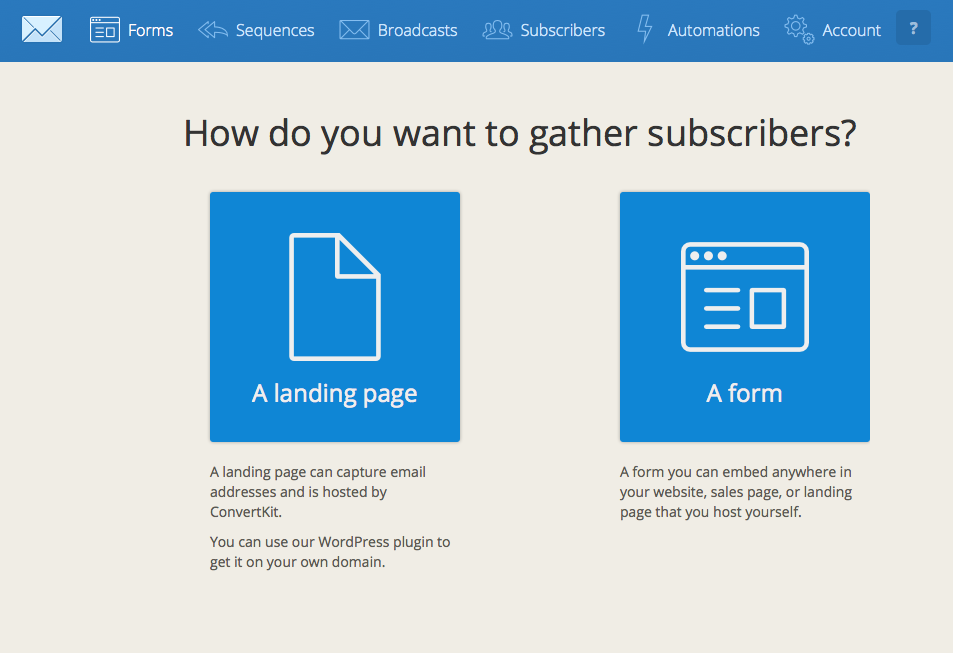
Next, go over to “forms.” Here, we'll create a landing page or form where readers can sign up. On the top right, click create form. Then click “a form.” Next, you'll get a preview of what your form will look like. So click on “Settings” to edit the content of the form.
Name your form, then you can customize what the “success” message will be. Meaning, what will they see after they submit their email address. Think of this kind of like a thank you page.
Create an Incentive:
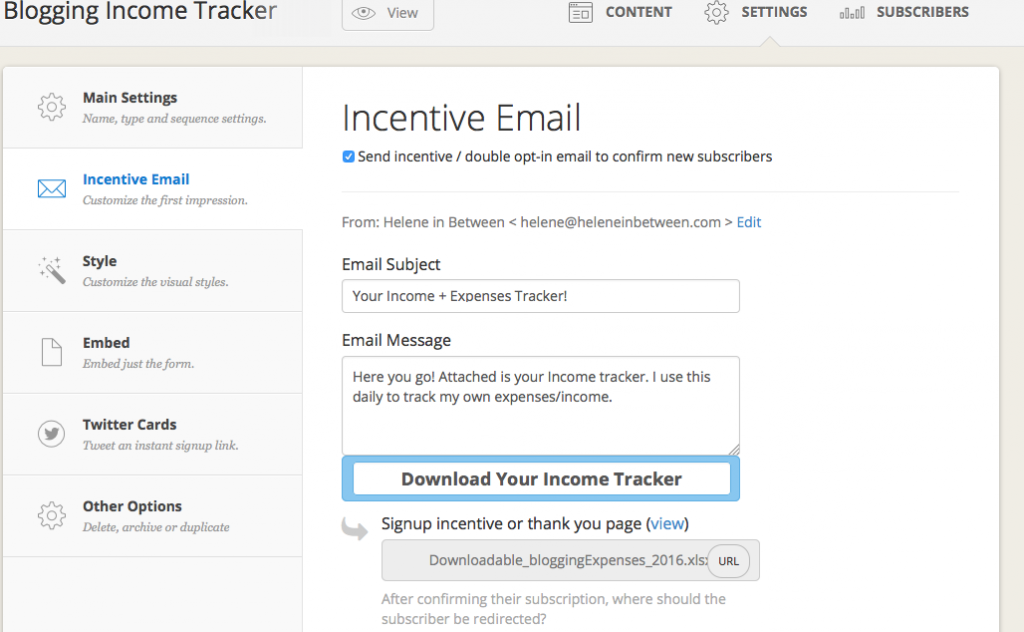
Then, click on “Incentive Email” on the left side. I love this feature. Let's say you want to send someone a guide, ebook, or anything downloadable, you can do this right inside ConvertKit by uploading it inside ConvertKit:
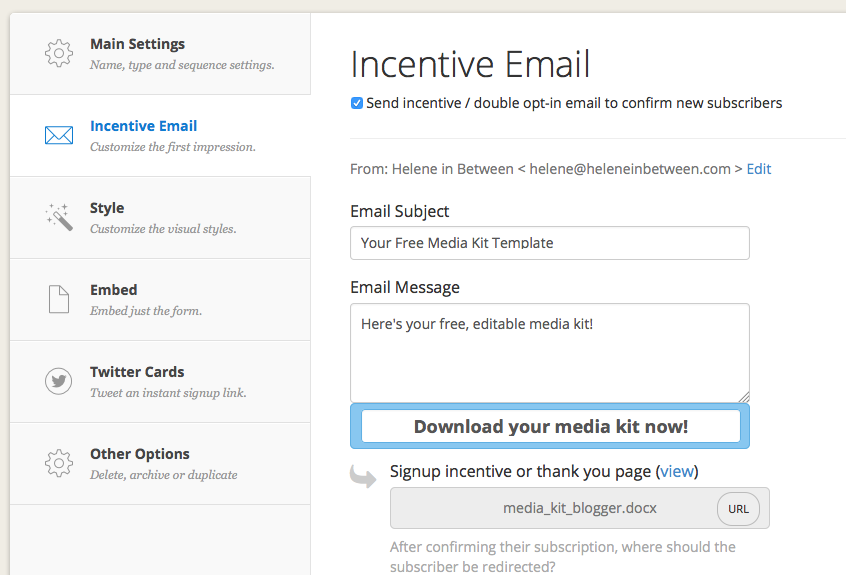
You can then choose to embed the form inside your blog (so that users can sign up) or utilize the Convertkit WordPress plugin to embed the form on your site. Don't want to create an incentive? No problem. Just unclick “send incentive/double opt-in email to confirm new subscribers” and no such email will be sent. Instead, you'll just collect the email addresses.
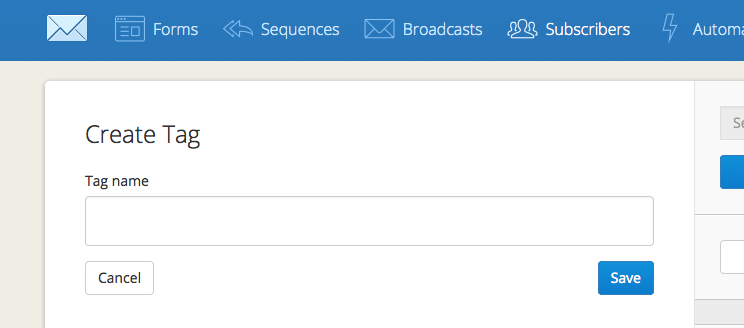
Anytime you want you can edit the style and the information inside the form. Create a tag to easily organize your subscribers. Click “Subscribers” at the top. Then click “add a tag.”
Create a Tag:
I have tags for all sorts of subscribers, based on how they subscribed. For example, in the form above I have “Media kit template.” So, I also have a “media kit tag.”
Create Automations:
Once you create a tag, you'll go to “Automations” to create a rule. Once someone signs up for a form, we want to add trigger a rule that adds a tag based on signing up. Here's what the rule looks like when someone signs up to receive my media kit templates:
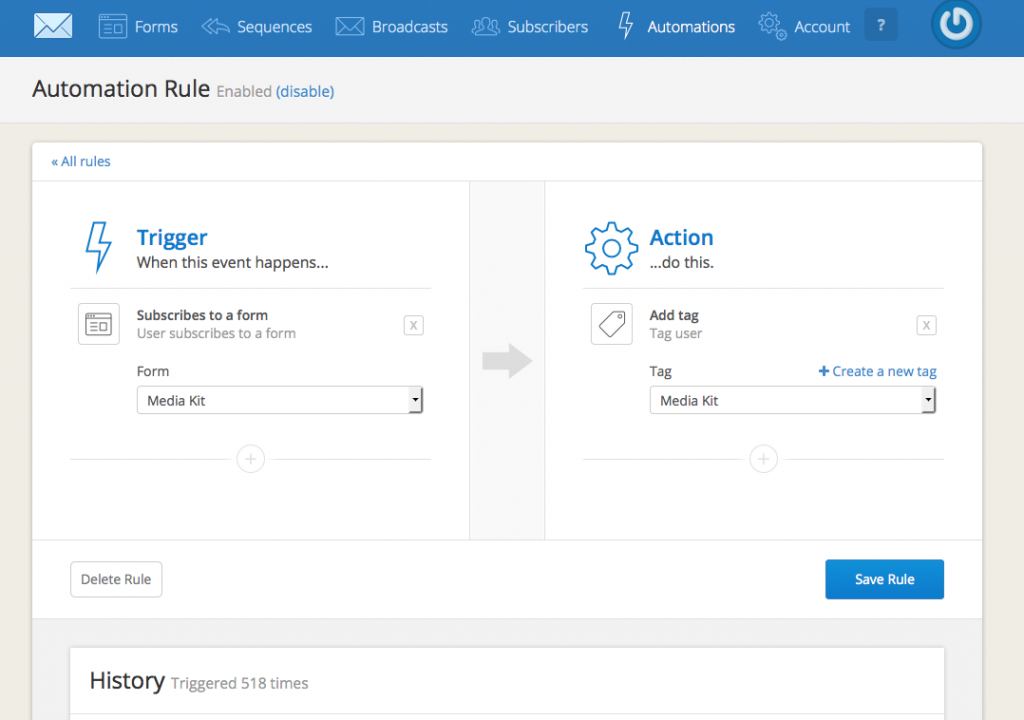
You can even check to ensure it's working by looking at the “history” to see when the automation is triggered.
Send an email to subscribers:
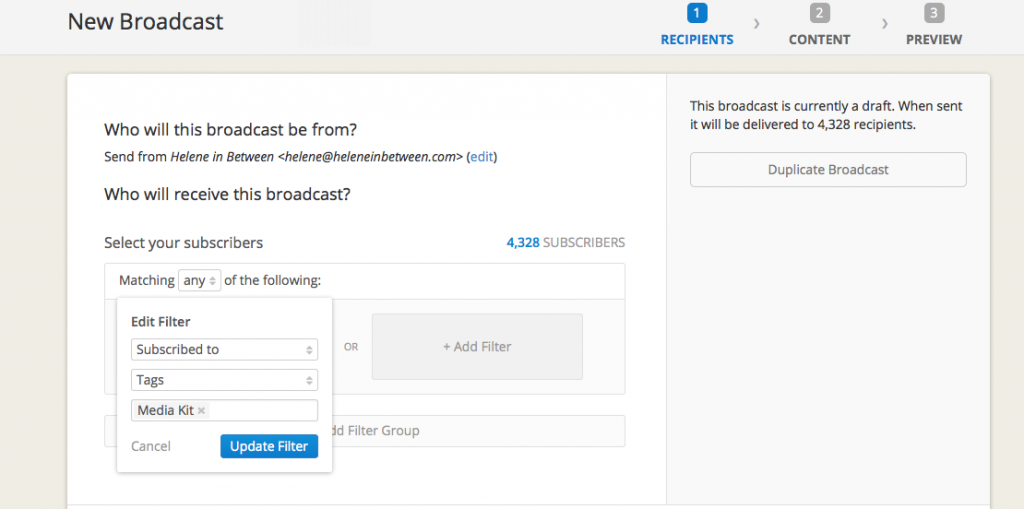
Now that you have all of this set up, next, you need to send out an email! To send an email to your subscribers once the above is set up, simply click “Broadcasts” at the top. Then click “new broadcast” on the right. Choose who you want to send the newsletter to.
Then compose your newsletter. Double check that every thing is in working order by sending yourself a test email.
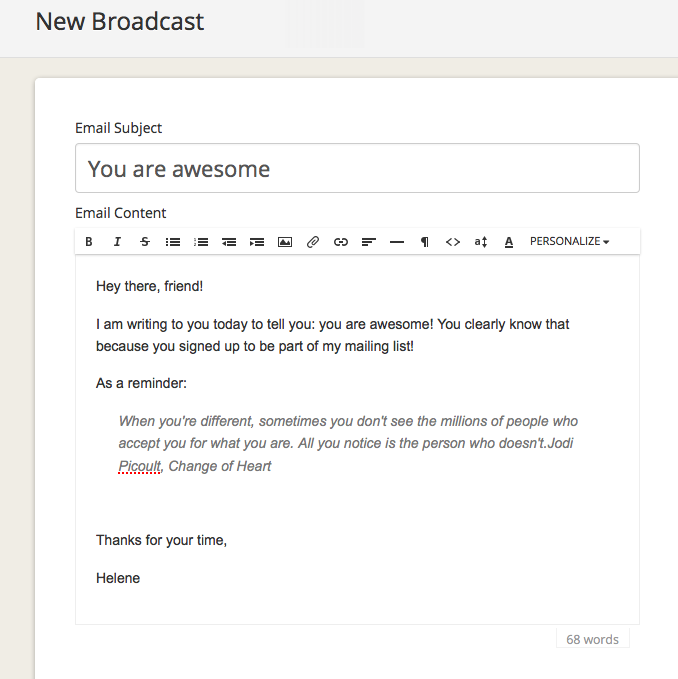
Then hit “Send Broadcast.” You can take a look at reporting for how your email did (open rate, unsubscribes, number of clicks) directly inside each broadcast. OR, you can schedule the broadcast, to have it sent at a specific time.
If you'd rather create a sequence, simply click on Sequence and create the string of emails and when you'd like them to be sent. Do so by changing up the number of days after an email is sent.
That should do it! I know this post is jam packed, but I wanted a way for anyone even remotely interested in a newsletter to see their options and the process. Like this post? Tweet about it!


